9. Hand Gesture Recognition in ROS
You have done a great job so far by writing both the publisher and subscriber all by yourself. However, I hope you still remember one of the very important reasons we learn ROS: "Don’t reinvent the wheel", meaning there are a lot of existing cool packages (or projects) which can be immediately deployed without much effort of implementation. In this chapter, you will learn how to clone and run an available package that detects hand signs on the published images from your webcam. So instead of just viewing images like in chapter 8, you can now use them to get really useful information. Let's get started!
Hand Gesture Recognition
A system that can understand human hand gestures has enormous applications. In robotics, it helps, for example, convert gesture recognitions into control signals making a robot follow users' hands.
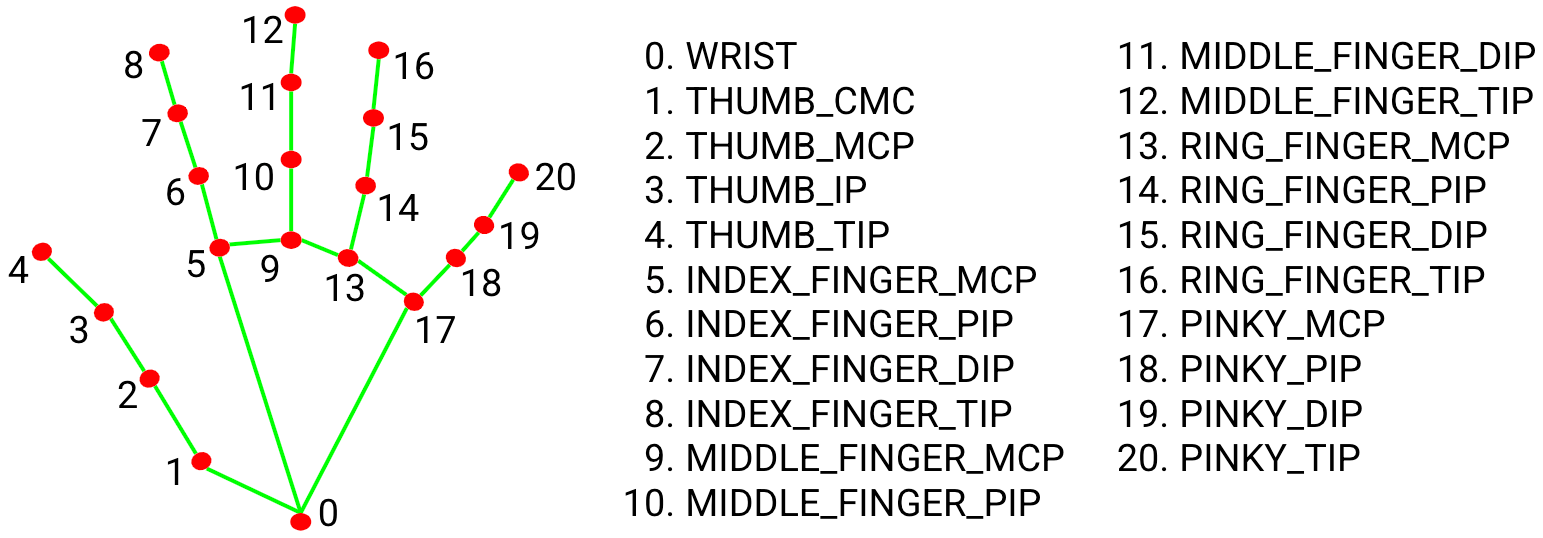
With the recent developments in artificial intelligence (AI), integrating that system is easier than ever. In this chapter, I want to introduce to you the Mediapipe Hands which is an open-source machine learning (ML) package from Google that can help track human hands and fingers using images. Basically what it does is combine two ML models: a palm detection model for detecting initial hand locations and a hand landmark model for precisely localizing the 21 3D hand-knuckle (see image below) coordinates inside the detected hand regions. It was trained with about 30k real labeled data and works in a single-shot manner which is very fast. A good introduction to this package can be found here.
Now we need to turn the detected key points from Mediapipe into meaningful actions, for instance from the hand landmark image above, our system should tell us the status is "Open" since all the fingers are stretched out. In order to do that, another model for classifying the actions is required. Luckily, there is already an existing program for that. This hand-gesture-recognition-mediapipe repository contains Python scripts that help user train and deploy models to recognize hand signs and finger gestures. I have used it myself and converted it into this ROS package so that you can clone it directly. You're welcome!
Installation
First, install the following dependencies using pip3 or conda:
Mediapipe 0.8.1
OpenCV 3.4.2 or Later
Tensorflow 2.3.0 or Later
For example, installing commands with pip:
pip3 install mediapipe
pip3 install opencv-python
pip3 install tensorflow
Then, clone this repository into the folder catkin_ws/src:
cd ~/catkin_ws/src
git clone https://github.com/TrinhNC/ros_hand_gesture_recognition.git
Build the package:
cd ~/catkin_ws
catkin build
Run the package
After building successfully, you can run a demo. Remember to source the workspace by source ~/catkin_ws/devel/setup.bash. Open 2 terminals. In the first terminal run the image publisher (from chapter 7 and make sure the webcam is connected to the virtual machine if you are using one):
roslaunch my_cam my_cam.launch
In the second terminal, run the hand pose recognition:
roslaunch ros_hand_gesture_recognition hand_sign.launch
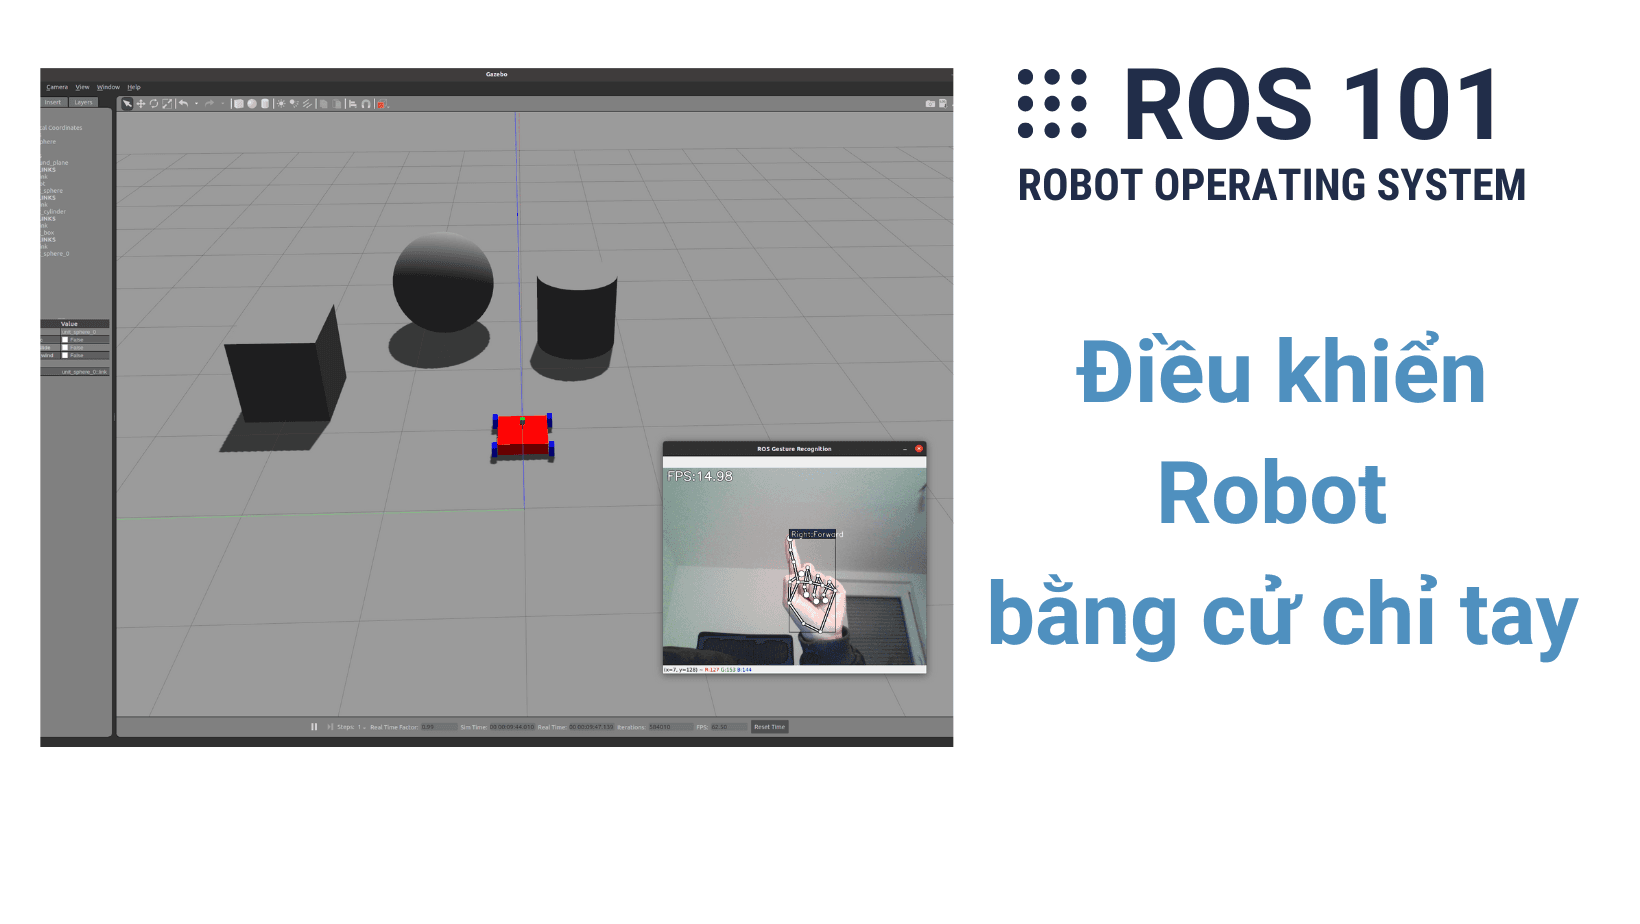
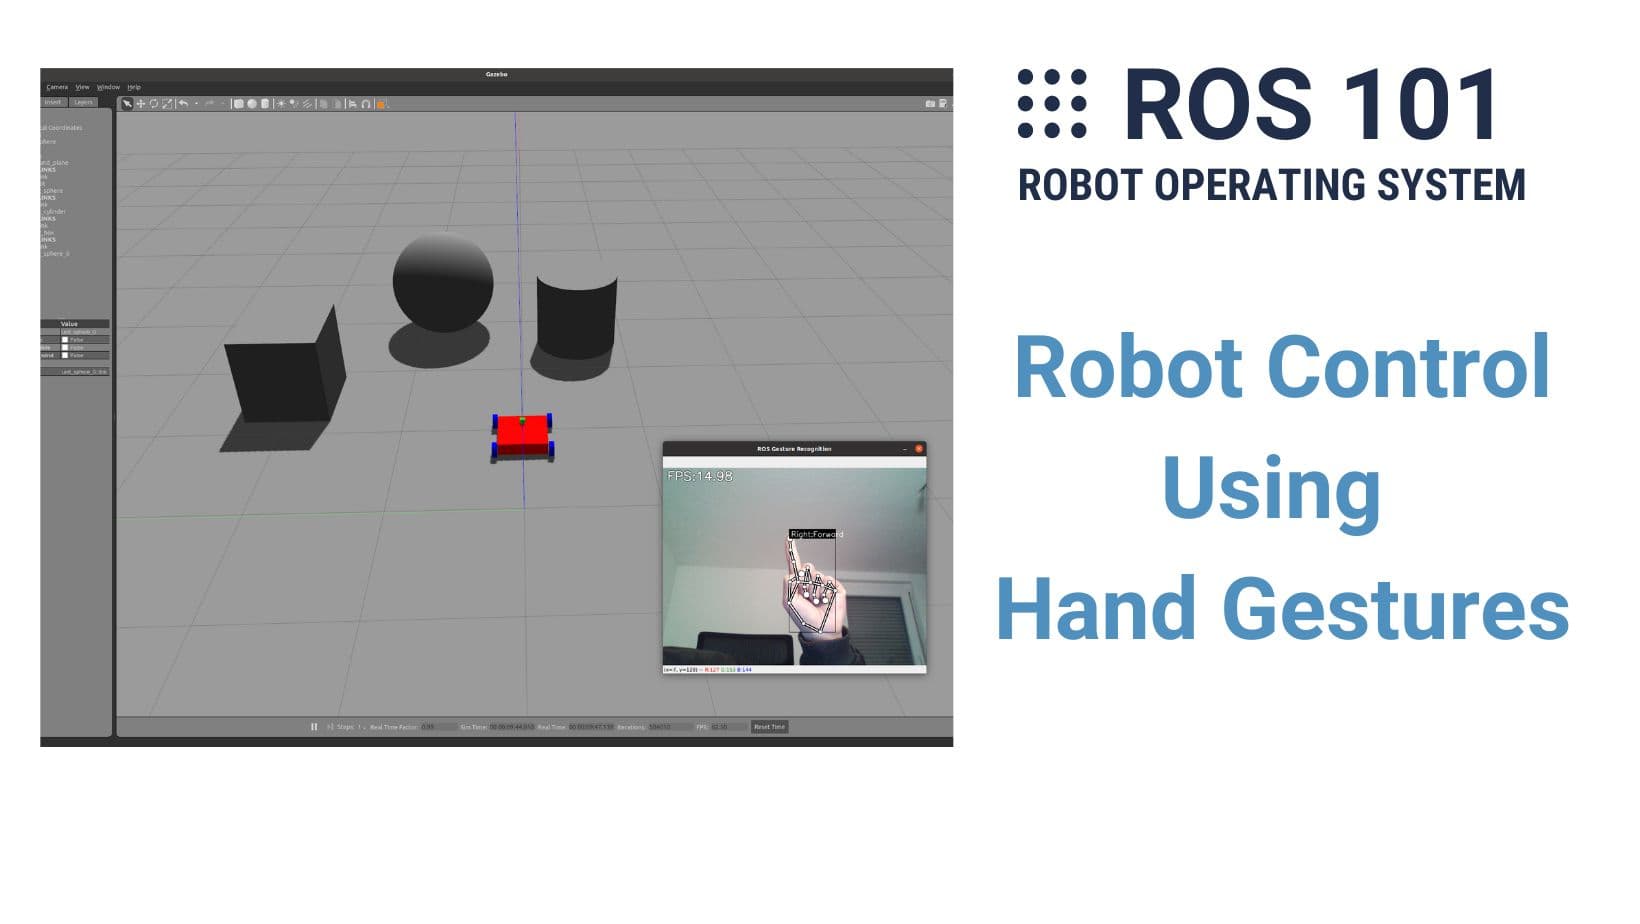
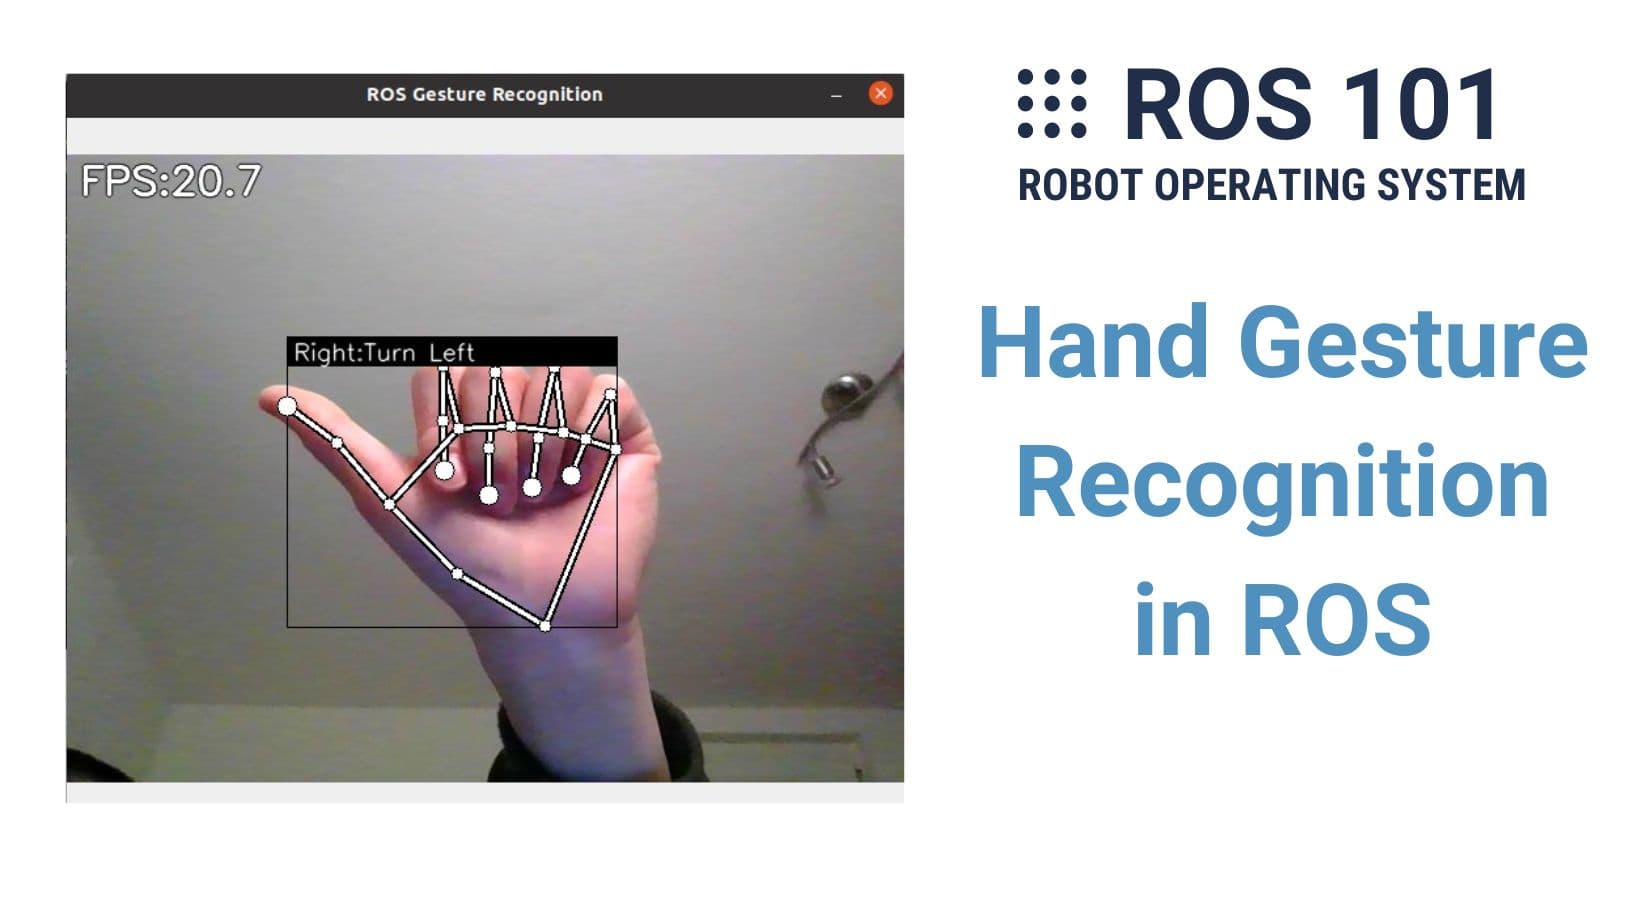
The result should look like this:

In the GIF above, FPS stands for Frame Per Second which is the number of images being processed per second, Right is the right hand and the words after that (Turn Right, Forward, etc.) are the labels that I assigned to specific hand signs. You can change these labels by following the section below.
Train Hand Sign Recognition (Optional)
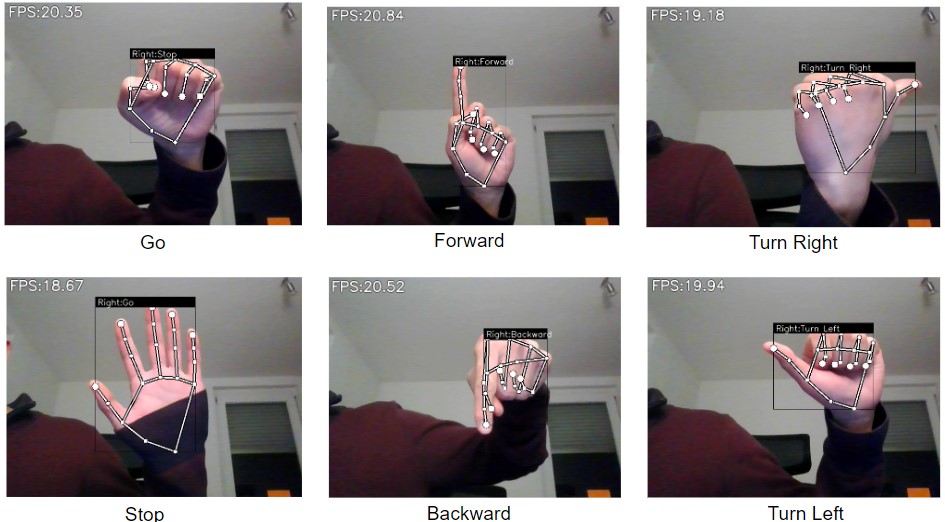
The current package can classify only six signs (classes) and I labeled them: Stop, Go, Forward, Backward, Turn Right, and Turn Left (see the image below) which will be converted to control signals to move a robot later in this series. If you want to change or add gestures, or you find out that my trained model does not perform very well with your hand, you can collect data and train it again by yourself.
There are two jupyter notebooks included in the folder src/notebooks:
keypoint_classification_EN.ipynb: a model training script for hand sign recognition.
point_history_classification.ipynb: a model training script for finger gesture recognition (meaning the model after training can detect the movement of your fingers and not just a static sign like in the keypoint classification).
I used only the keypoint classification model in the current ROS package because it is enough for the application but you can feel free to adjust it to match yours.
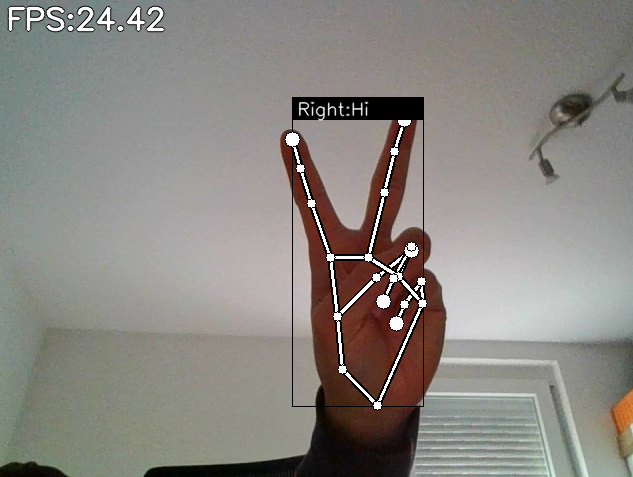
In the example below, I will show you how to add one more sign to the detection. Let's say we want to add this sign✌️and name it "Hi". Remember to end all the commands (using Ctrl + C) from the previous parts because this part is completely separate from ROS.
You may need to install these extra libraries if you have not:
pip3 install -U tf-nightly
pip install -U scikit-learn
pip3 install -U matplotlib
First, open the keypoint_classifier_label.csv in the folder src/model/keypoint_classifier. Here you find all the labels (at the moment 6 classes) and you should add 'Hi' to the end like this:
Stop
Go
Forward
Backward
Turn Right
Turn Left
Hi
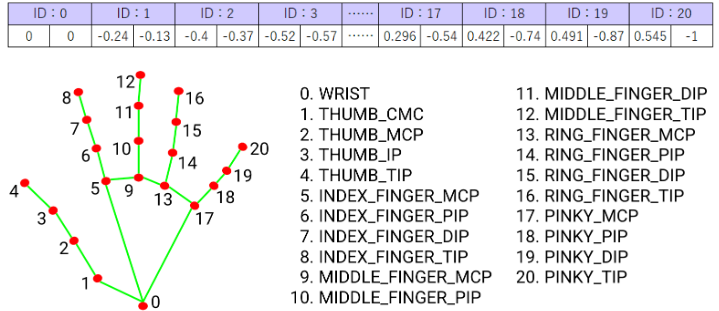
Next, you need to record data and append it to the file keypoint.csv in the folder src/model/keypoint_classifier. If you open this file, you will see it contains 6410 lines. The first number in each line is the class ID with respect to the list above, for example, "Go" has ID 0, "Stop" has ID 1, and so on. Then comes 42 numbers or 21 pairs of numbers which represent the coordinates of each keypoint (i.e. the hand knuckle) with respect to the origin which is the wrist. One thing to note is that the IDs in the image below are the key point IDs (0-20) and they are different from the class IDs (0-6).
In order to record data, run the script app.py:
python3 app.py
Press k on the keyboard and you should see the line MODE: Logging Key Point shows up. Then, use your right hand to make the target sign✌️visible. Press and hold the number 6 (class ID of "Hi") with your left hand. This will continuously append the new data to the file keypoint.csv until you release the key. You can also try to press & release 6 immediately and check the file. It should have one new line at the end starting with the number 6 and a list of numbers that follow. Also, during the recording, remember to move your right hand to different positions to make the data varied.

After recording for about 10-15 seconds, the data should be ready and you can stop the program. Open the notebook file keypoint_classification_EN.ipynb. Edit dataset, model_save_path and tflite_save_path to match your paths. Change NUM_OF_CLASSES to 7 instead of 6: NUM_CLASSES = 7. Then run the notebook from beginning to end. The training is executed in the cell [13] and takes around 2-3 minutes. After that, you can launch my_cam.launch and hand_sign.launch like in the Demo to see the result like below.